We stand at a fascinating cultural and technological crossroads where the dystopian, rain-slicked neon alleys of speculative fiction have graduated from cinematic backdrops to physical reality. For decades, enthusiasts watched Blade Runner, Neuromancer, and Cyberpunk 2077, yearning to touch the exposed wiring, glowing optical lines, and industrial-grade chassis designs flickering on screen. Today, the convergence of advanced CNC machining, addressable multi-zone LED integration, UV-reactive acrylics, and micro-welded custom liquid cooling loops has transformed high-end desktop computing. Building a truly immersive cyberpunk PC aesthetics setup is no longer merely about plugging in a generic RGB strip; it is an exercise in industrial design, engineering precision, and atmospheric storytelling.
The modern hardware landscape has undergone a radical paradigm shift. Gone are the days when clean, minimalist white-and-black builds or understated corporate workstations dominated the enthusiast market. Modern builders demand grit, texture, asymmetric geometry, and sensory overload. They want rigs that look as though they were salvaged from an underground tech-noir hacker den in Night City or assembled in a zero-gravity orbital station. This demand has spurred an explosive subculture of custom modded hardware, pushing the limits of what can be achieved when off-the-shelf components meet raw artistic vision, custom metal fabrication, and intricate wiring harnesses reminiscent of high-end aerospace engineering.
This comprehensive, master-level blueprint will guide you through every phase of conceptualizing, engineering, and executing the ultimate neon gaming rig. We will deconstruct the core principles of sci-fi case mods, examine material science, analyze electrical power distribution for complex lighting networks, and troubleshoot the structural challenges that separate amateur hobbyists from master-tier hardware modders. Whether you are aiming for a pristine Arasaka-style corporate-futuristic workstation or a grimy, cable-laced scrap-heap deck, prepare to elevate your system building to an entirely new artistic echelon.
Deconstructing the Cyberpunk Aesthetic: Design Language and Philosophy
The Dichotomy of Clean Tech and Dystopian Grunge
The most successful cyberpunk PC aesthetics balance two conflicting visual extremes: hyper-advanced corporate sleekness and gritty, worn-down street-level industrialism. To achieve this in physical hardware, you must avoid making your chassis look like a generic rainbow-vomit gaming toy. Instead, focus on asymmetric blocking, matte-black powder-coated structural frames, and exposed mechanical details. Think of your case as a cross-section of a futuristic urban skyline—smooth titanium surfaces interrupted by aggressive ventilation grills, warning stencils, and hazard striping.
When selecting your base chassis, look for frames with industrial bones. Open-frame designs, heavily modded mid-towers, and server-rack conversions provide the ideal canvas. Layering these structural elements with weathered paint techniques, intentional scuffs, and faux-corrosion gives the hardware a lived-in narrative. It shifts the perception of the machine from a pristine consumer product to a specialized tool that has survived digital turf wars and countless sleepless nights of data running.
Color Theory: Neon Contrasts and Atmospheric Lighting
Lighting in a true sci-fi case mod is not about illuminating the interior evenly; it is about creating dramatic shadows, high-contrast focal points, and deliberate color bleeding. The traditional cyberpunk color palette relies on aggressive contrasts—most notably cyan and magenta, acid green and deep ultraviolet, or amber safety warnings slicing through cold steel blue. By utilizing addressable RGB (ARGB) ecosystems, you can program liquid-cooling fluids and interior strips to simulate neon flicker effects, slow electrical hums, or pulsing data streams.
Furthermore, integrating physical lighting modifiers like frosted acrylic diffuser plates, honeycomb mesh screens, and etched glass panels helps break up harsh point sources of light into smooth, diffuse glows. When light interacts with translucent colored coolants and braided metallic wiring sleeves, it casts complex reflections across the interior components, giving the illusion of deep, layered holographic circuitry operating within a confined physical space.
Structural Engineering and Sci-Fi Case Modding Techniques
Custom Metal Fabrication and Structural Alterations
Off-the-shelf PC cases rarely capture the true, chaotic beauty of futuristic dystopian hardware right out of the box. Master builders frequently employ custom metal fabrication—utilizing sheet aluminum, steel mesh, and structural rivets—to modify factory panels. Cutting window cutouts with precise geometric angles, riveting perforated reinforcement plates over intake fans, and fabricating custom I/O shroud covers instantly elevates a standard manufacturing shell into a bespoke sci-fi artifact.
Safety and precision are paramount during this phase. Always map out your structural cuts using vector design software before committing a laser cutter or jigsaw to metal panels. Deburr every edge meticulously, and treat raw exposed metal with self-etching primer followed by high-durability matte or textured industrial paints. The goal is to make every modification look factory-original to this alternate universe, as if the chassis rolled off a heavy industrial assembly line in the year 2077.
Integrating Custom Acrylics and Laser-Etched Panels
Acrylic and polycarbonate sheets are the backbone of advanced case modding, allowing builders to create custom mid-plate covers, reservoir mounts, and illuminated side windows. By utilizing laser engraving techniques, you can etch complex circuit board traces, corporate logos from dystopian megacorporations, or warning glyphs directly onto clear or tinted acrylic. When edge-lit with high-intensity LED strips, these etched lines capture the light and glow with terrifying intensity.
To maximize this effect, sandwich your etched acrylic panels between dark tinted outer layers to conceal the lighting source completely when powered down. When the system boots up, the hidden graphics slice through the darkness like holographic interfaces. This technique mirrors the visual language found in modern Passthrough Augmented Reality Gaming: Blending Virtual Holograms with Physical Living Rooms, where digital data interfaces seamlessly overlay physical environments to trick the human eye into perceiving depth and luminescence.
Advanced Cooling: Liquid Loops as Sci-Fi Bloodlines
Rigid Tubing Geometry and Hardline Routing
In a neon gaming rig, the liquid cooling loop is not just a thermal management system; it is the circulatory system of the machine. Soft rubber tubing breaks the sci-fi immersion, whereas rigid PETG or acrylic tubing allows for razor-sharp 90-degree angles, parallel runs, and complex multi-tiered geometries that mimic industrial piping in a chemical refinery or starship engine room.
When planning your hardline runs, utilize specialized bending mandrels and digital heat-gun temperature monitoring to ensure perfectly crisp bends without wall-thinning. Incorporate rotary fittings, drain valves disguised as emergency pressure release ports, and multi-port distribution blocks (distro plates) styled like central processing manifolds. These components eliminate unnecessary tube clutter while providing a centralized structural anchor for the entire cooling layout.
Coolant Chemistry and UV-Reactive Illumination
The choice of coolant dictates the visceral feel of your hardware. Clear coolants paired with colored tubing offer reliability, but for a true cyberpunk aesthetic, opaque pastel fluids or UV-reactive formulations provide unmatched visual payoff. Under the glow of carefully positioned ultraviolet blacklight diodes, UV-reactive coolants seem to glow from within, creating a radioactive, bioluminescent effect that captures the eye.
However, advanced builders must balance aesthetics with chemical longevity. Opaque nanoparticle coolants are notorious for dropping out of suspension and clogging micro-fin CPU and GPU water blocks over time. To combat this, schedule a complete system flush and coolant replacement every six months, treating maintenance not as a chore, but as a ritualistic overhaul of your cybernetic organism.
Wiring Harnesses, Micro-Electronics, and Cable Management
Hand-Sleeved Cabling and Military-Grade Connectors
Nothing ruins a meticulously crafted sci-fi aesthetic faster than standard plastic-coated power supply cables snaking carelessly across the motherboard. Achieving a professional finish requires custom-sleeved cables using paracord or PET sleeving. Opt for industrial colorways—gunmetal gray, hazard yellow, reflective carbon black, or matte white—secured with aluminum cable combs to maintain absolute parallel alignment.
To take your custom modded hardware to the absolute peak of realism, replace standard internal connectors with military-grade aviation plugs (such as GX12 or GX16 metal screw connectors) for pass-through bulkhead connections. Routing braided sensor lines through external armored conduits mimics the exposed umbilical cables found on heavy industrial mechs and deep-sea exploration suits, reinforcing the utilitarian engineering narrative.
Power Distribution Hubs and Microcontroller Integration
Running dozens of ARGB fans, pump speeds, temperature sensors, and pump controllers overloads standard motherboard headers. To manage this electrical load safely, integrate dedicated powered USB hubs, SATA-powered ARGB repeaters, and standalone microcontrollers like Arduino or Raspberry Pi Pico units hidden behind the motherboard tray. These microcontrollers can be programmed to run custom lighting profiles independently of host operating system software.
By writing custom firmware, you can simulate erratic power surges, flickering neon sign failures, or biometric heart-rate pulses that react in real-time to your CPU temperatures. This level of hardware interactivity transforms the PC from a static display piece into a responsive, breathing entity that feels genuinely alive.
The Human-Machine Interface: Peripherals and Environmental Integration
Matching Deskmats, Custom Keyboards, and Audio Gear
A neon-drenched custom rig cannot exist in a vacuum; it requires a cohesive physical ecosystem to sell the illusion. Your desk setup should be an extension of the chassis architecture. Pair your rig with a custom mechanical keyboard featuring tactile, heavy switches, brass weight plates, and keycaps bearing futuristic sublegends, kanji characters, or industrial symbols.
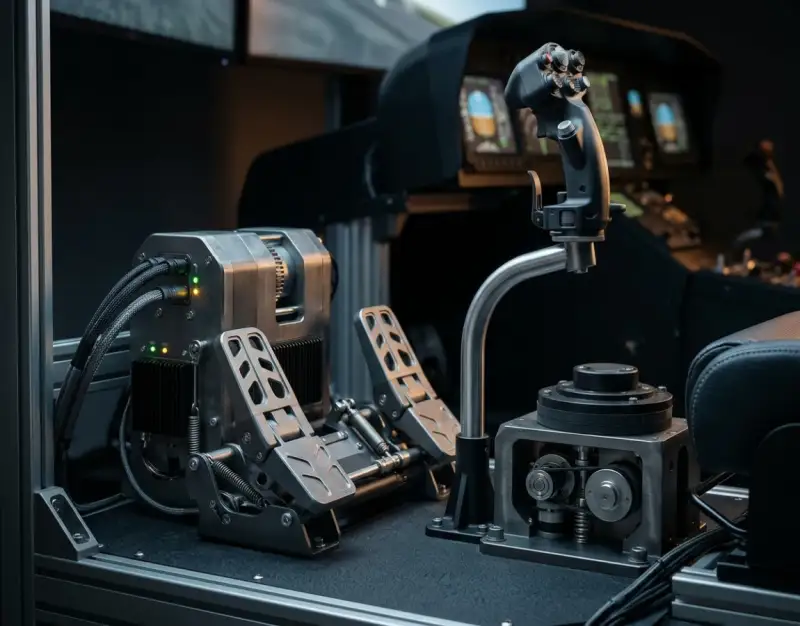
Extend the sci-fi immersion to your audio and control hardware. Headphone stands machined from solid blocks of aircraft aluminum, custom-monitored DAC/amps with glowing vacuum tubes or industrial toggle switches, and tactile input devices create a unified sensory workstation. For enthusiasts exploring advanced immersion beyond the desktop, pairing a cyberpunk rig with specialized analog controls creates a cockpit feel reminiscent of configuring Advanced Flight Sim Hardware: Force Feedback Rudder Pedals and Cyclic Controls for precision navigation through gritty sci-fi flight simulators.
Room Lighting, Acoustic Dampening, and Spatial Environment
The final layer of the cyberpunk aesthetic is environmental immersion. Hard surfaces in your room will bounce sound and glare, ruining the moody atmosphere. Install acoustic wall panels wrapped in dark geometric fabrics, complemented by smart ambient light bars casting long, bleeding shadows across your walls.
Smart home integration plays a subtle yet powerful role here. By connecting your room lighting ecosystem to your PC monitoring software via local APIs, your entire physical workspace can shift color palettes based on system states—pulsing emergency crimson when your GPU hits thermal thresholds during heavy gaming sessions. This blurs the boundary between physical room decor and digital hardware output.
Real-World Case Studies & Scenarios
To truly understand what separates an amateur build from a masterpiece, let us examine two contrasting case studies from the global modding community.
Case Study A: Project "Ghost-Line" (The Triumph of Planning)
The Objective: Build a compact mid-tower rig modeled after a high-security corporate data vault from a dystopian near-future.
Execution: The builder spent four months in CAD modeling every internal plate before touching a single piece of metal. They utilized a custom dual-chamber steel chassis, hand-cut frosted acrylic distro plates, and rigid copper tubing painted with gunmetal automotive enamel. All cabling was individually measured, soldered, and sleeved with military-grade paracord. A hidden Arduino Nano controlled a suite of flicker-matched amber LEDs simulating dying neon tubes.
Data Points & Results: The system achieved a pristine 0.0mm tolerance on all hardline tubing runs, maintained a Delta-T under 12°C under full synthetic load, and won first place at an international modding exposition. The total build time exceeded 180 hours, proving that meticulous pre-planning and material discipline yield elite results.
Case Study B: Project "Neon-Overload" (The Pitfalls of Impulsive Modding)
The Objective: Rapidly assemble an ultra-bright neon gaming rig over a single weekend using off-the-shelf components and maximum RGB saturation.
Execution: The builder crammed cheap soft-tubing, generic unbranded ARGB strips, and mismatched fans into a budget glass-panel case. Lacking proper power distribution, they daisy-chained four different lighting controllers directly into standard motherboard headers, overloading the internal trace power lines.
Data Points & Results: Within 48 hours of operation, the excessive electrical draw caused a motherboard header failure, frying two ARGB hubs and melting a fan connector. Furthermore, the chaotic cable management blocked critical airflow pathways, resulting in thermal throttling during basic gaming workloads. The builder had to completely tear down the system, scrap the melted components, and restart from scratch with proper electrical engineering principles.
Critical Mistakes and How to Avoid Them
Navigating the complex world of custom modded hardware is fraught with potential pitfalls. Avoid these five critical mistakes to ensure your project succeeds.
- Overloading Motherboard ARGB Headers: Daisy-chaining dozens of high-draw LED fans directly into a single motherboard header will exceed the standard 3-amp limit, resulting in fried traces or dead lighting zones. Countermeasure: Always use dedicated, SATA-powered ARGB hubs and isolated power controllers for complex lighting arrays.
- Neglecting Structural Airflow for Aesthetics: Sealing a case with solid metal panels or dense acrylic shrouds to achieve a clean look often starves high-wattage components of fresh air. Countermeasure: Utilize CNC-machined mesh ventilation patterns and maintain balanced intake-to-exhaust static pressure ratios.
- Rushing Hardline Tube Bends: Uneven heating with a heat gun causes wall thinning, kinks, and microscopic structural weaknesses that lead to catastrophic coolant leaks under pressure. Countermeasure: Invest in silicone insert cords, precise bending mandrels, and take your time warming a wide band of tubing evenly.
- Ignoring Maintenance Access: Building an extraordinarily complex multi-tier loop or wiring harness that requires complete system disassembly just to clean a dust filter is an operational nightmare. Countermeasure: Design your chassis with modular quick-disconnect fittings and easily removable magnetic filter frames.
- Clashing Design Themes: Mixing pristine Apple-esque minimalist white aesthetics with grimy, rust-weathered cyberpunk decals creates a confusing visual narrative that lacks artistic cohesion. Countermeasure: Establish a strict lore and design mood board before purchasing components, ensuring every part speaks the same visual language.
Comprehensive Hardware & Approach Comparison
| Modding Element | Amateur Approach | Master-Tier Execution | Impact on Sci-Fi Immersion |
|---|---|---|---|
| Cooling Media | Standard AIO coolers with stock rubber tubing | Custom hardline PETG/Copper with distro plates | Transforms thermal upkeep into a visceral industrial piping system. |
| Cable Management | Stock plastic cables stuffed behind the back panel | Hand-soldered, custom-sleeved paracord with aviation connectors | Eliminates visual clutter and mimics aerospace/mecha wiring. |
| Lighting Control | Default software rainbow wave profiles | Microcontroller-driven custom firmware with flicker/surge effects | Breathes dynamic, unpredictable life into the hardware. |
| Chassis Modification | Out-of-the-box tempered glass gaming case | Custom CNC-milled aluminum panels with laser etching | Establishes a unique, bespoke dystopian artifact narrative. |
Frequently Asked Questions (FAQ)
What is the best case material for custom cyberpunk modding?
Aluminum and cold-rolled steel are the gold standard for structural case modding. Aluminum offers an excellent strength-to-weight ratio, is easy to cut and drill with standard workshop tools, and accepts powder-coating and anodizing exceptionally well. Steel provides unmatched rigidity and weight, making it ideal for heavy industrial builds that incorporate real metal plating, heavy-duty mounting brackets, and welded structural reinforcements.
How do I prevent hardline cooling tubes from leaking over time?
Preventing leaks begins with precise tube cutting, proper chamfering of inner and outer edges to avoid tearing o-rings inside fittings, and ensuring that all runs enter fittings at a perfect 90-degree angle without lateral tension. Always pressure-test your loop using an air pressure tester (pumped up to 0.3-0.5 bar) for at least 15 to 30 minutes *before* introducing any liquid coolant into the system.
Can I achieve a cyberpunk aesthetic without liquid cooling?
Absolutely. While custom water loops offer the ultimate sci-fi fluid-line look, air-cooled builds can look stunning when paired with massive dual-tower industrial heatsinks wrapped in custom mesh shrouds, retrofitted fan grills, and exposed copper heat pipes. The key is focusing on custom cable management, weathered paint detailing, and strategic accent lighting to elevate the industrial feel.
How do I safely power complex custom LED and microcontroller setups?
Never draw massive amounts of power directly from motherboard fan or RGB headers. Instead, utilize auxiliary 12V SATA power lines or dedicated molex connections routed to independent powered hubs. If you are integrating custom Arduino or Raspberry Pi controllers, power them through separate regulated step-down buck converters to isolate them from voltage spikes originating from high-draw PC components.
What weathering techniques look most realistic on PC hardware?
To achieve realistic wear and tear, avoid messy paint splatters. Instead, use dry-brushing techniques with metallic silver or gunmetal enamel paint along high-friction edges to simulate paint chipping. Apply dark wash liquid acrylics into recessed panel lines to simulate grime and oil buildup, and use fine sandpaper to gently distress plastic shrouds and aluminum plates in natural handling patterns.
Strategic Roadmap and Final Takeaway
Building the ultimate neon-drenched custom rig is a journey that transcends traditional PC assembly, bridging the gap between high-performance engineering and futuristic art design. As we look ahead over the next two to five years, the integration of smart-home IoT protocols, advanced micro-LED display panels embedded directly into tempered glass, and AI-driven thermal-aesthetic synchronization will continue to revolutionize how we interact with our desktop hardware. Furthermore, as immersive technologies evolve and intelligent ecosystems continue expanding—much like the seamless automation explored in Autonomous Gadget Ecosystems: Do Smart Home Robots Communicate Seamlessly Yet?—our custom rigs will no longer exist as isolated boxes under desks, but as core processing nodes within fully integrated sci-fi habitats.
Your immediate next step is to stop viewing hardware as temporary consumer goods and start treating your components as raw material for a larger narrative. Draft your blueprint, select your thematic color palette, map out your electrical distribution, and dive headfirst into the craft of custom modding. Build a machine that does not just run your favorite games, but tells an unforgettable story of survival, technology, and neon rebellion every time you press the power switch.
Be the first to share a gentle reflection on this story.